No problem. There's a gazillion of them in blogland.
But I wanted to design a headboard that was perfect for staging a bedroom. I wanted it to be --
- Lightweight so it could be moved easily when you move
- Self-supporting so you don't mess up your newly painted walls with hanging hardware
- Inexpensive so you don't spend money you could use for other home staging decor
- Quick and easy to make because you have enough to do getting your home ready to sell
- Attractive enough to be the focal point of a bedroom, and add value to your home
What you need
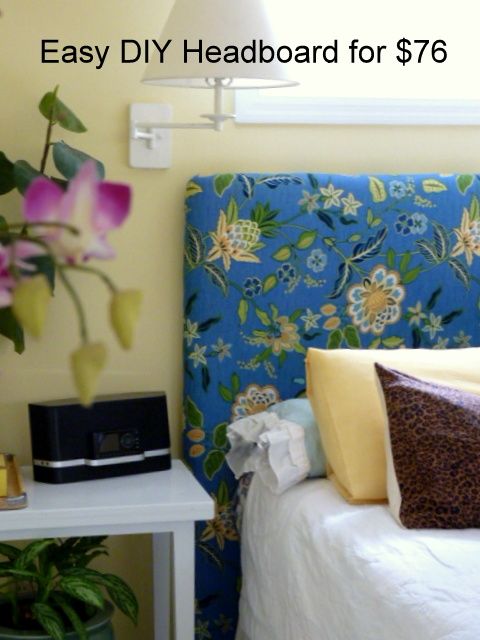
These are the supplies you'll need to make a headboard for a double bed. My total cost was $76, a nifty price for a headboard that tall and wide.
Have the store cut the hardboard into a 4-foot x 62-inch piece. You'll have a nice leftover piece of "project paneling" to take home if you want. You can adjust these measurements if you prefer a headboard that's not as tall or if you have a queen or twin bed. The hardboard cost about $12.50
If you want to make a tufted headboard, buying standard pegboard with holes in it will make your project easier. I opted for simple -- no tufting, no nailheads -- just padded.

- 2 10-foot 2 x 4s
- 4- x 8-foot sheet of 3/16-inch hardboard (wall paneling)
- 24 1-inch paneling nails
- 4 zinc corner braces with screws
- Hammer, screwdriver
- 2 Yards of fabric at least 54 inches wide
- 1-inch thick foam for extra long twin bed ( 39 x 80 inches)
- 2 1/4 yards quilt batting, 110 inches wide
- Stapler and staples
- Yardstick or measuring tape, scissors
- Spray adhesive or painters tape
Have the store cut the hardboard into a 4-foot x 62-inch piece. You'll have a nice leftover piece of "project paneling" to take home if you want. You can adjust these measurements if you prefer a headboard that's not as tall or if you have a queen or twin bed. The hardboard cost about $12.50
If you want to make a tufted headboard, buying standard pegboard with holes in it will make your project easier. I opted for simple -- no tufting, no nailheads -- just padded.

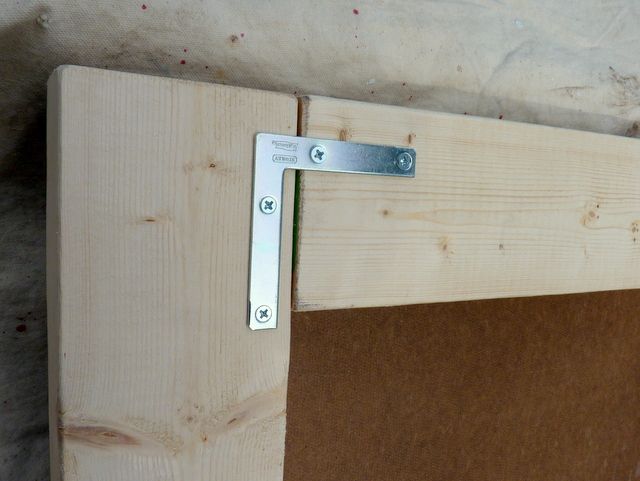
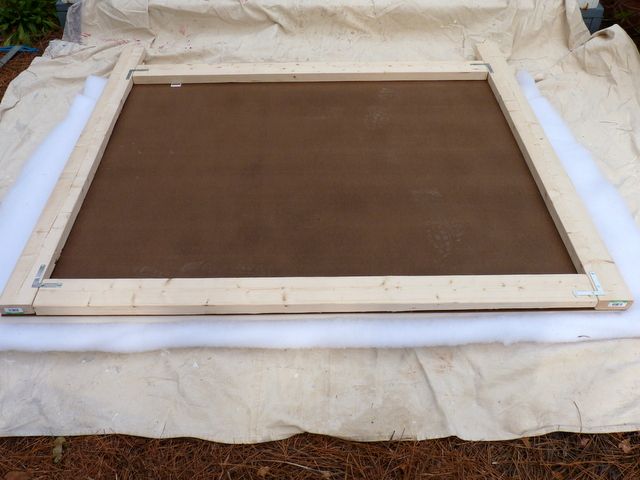
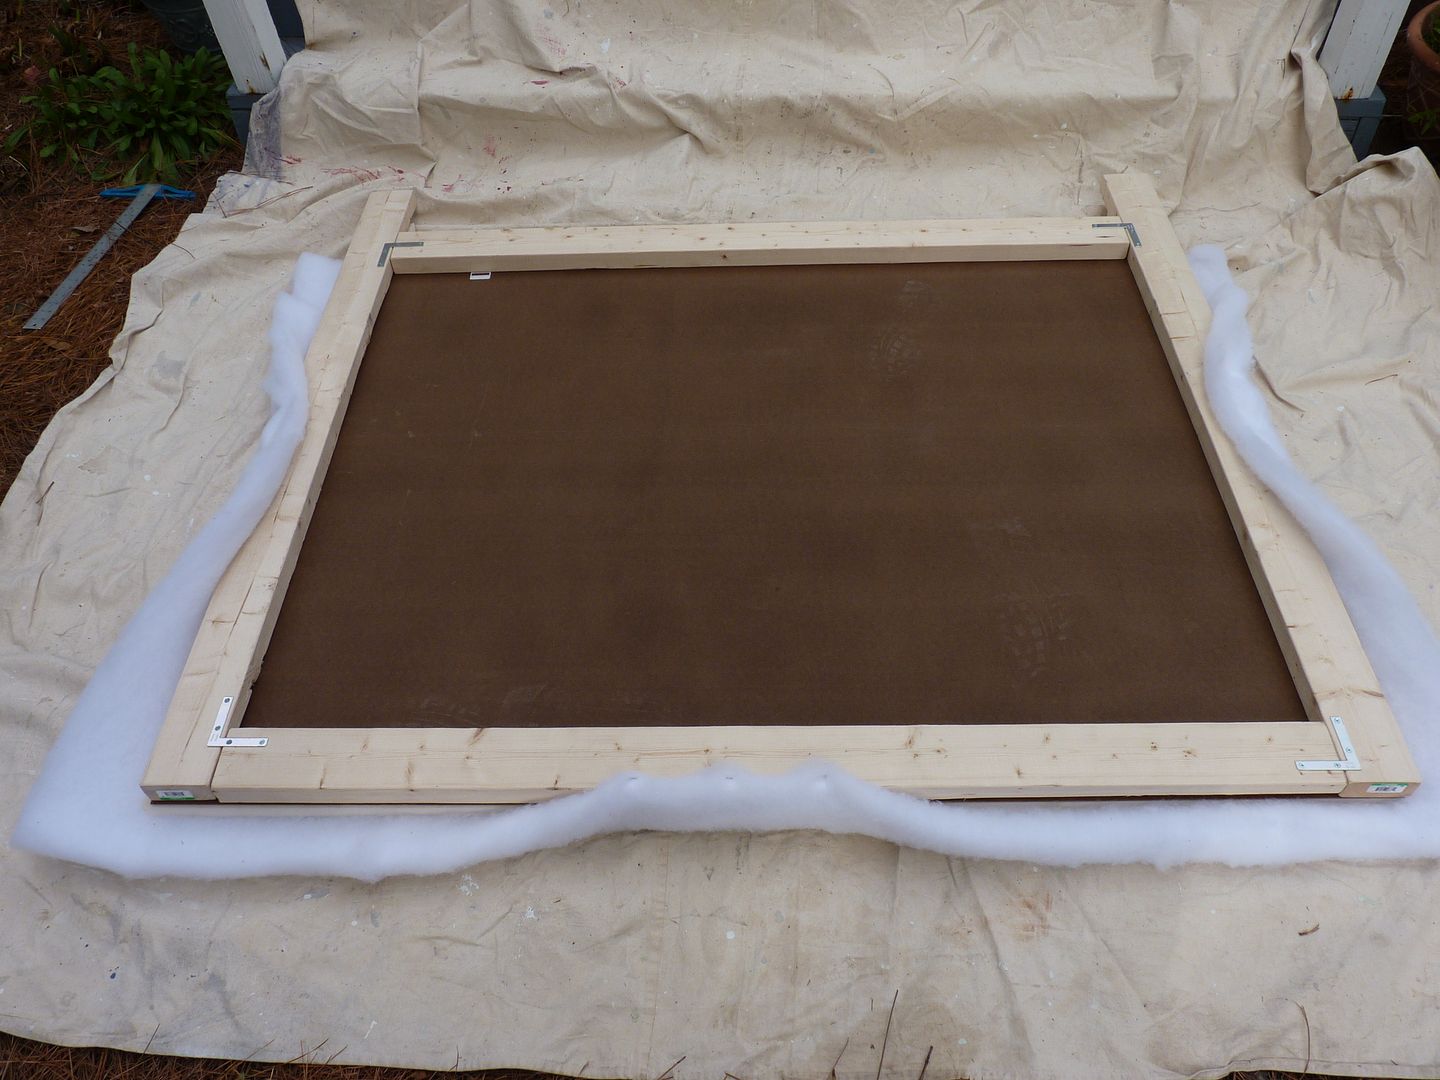
Lay the 2 x 4s on the ground or floor so they look like the above photo. Lay the hardboard on top (in the photo, it's on the bottom, the next step). Align the 2 x 4s accurately with the edges of the hardboard so that the corners are squared. Drive a nail into the hardboard at each corner and then at intervals of about 10 inches all around the four edges so that they go into the center of the 2 x 4s.

Screw the corner braces in at the corners as shown. These braces will strengthen the headboard. Lowes sells them in a package of four with screws for less than $3.
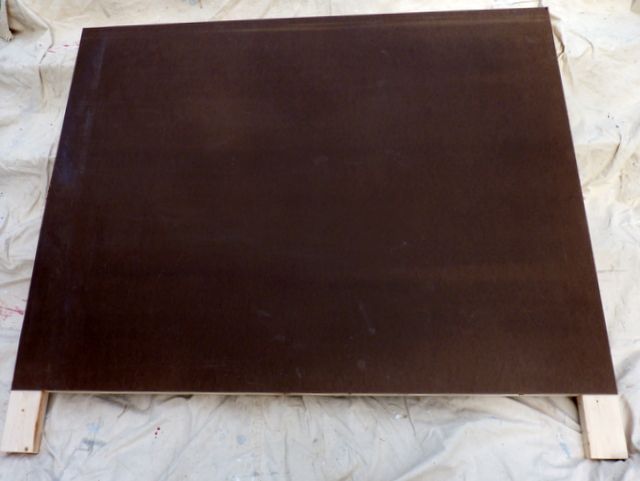
 Flipped front side up, your headboard will look like this. I worked outside on a dropcloth, but this project can be done in the house after the messy carpentry work is finished.
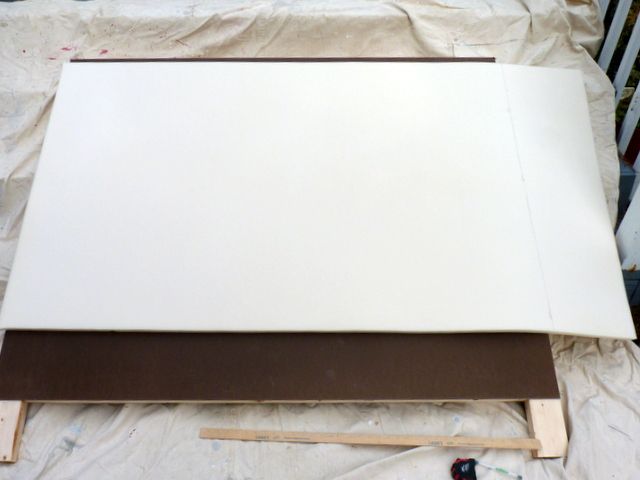
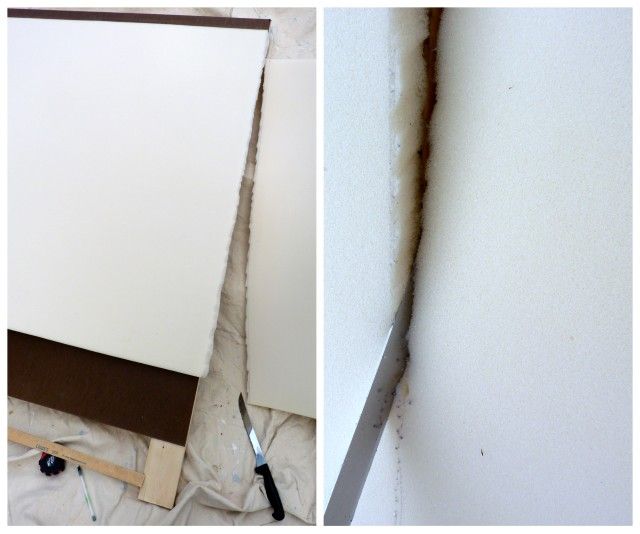
 The foam that's made to fit a long twin bed cost me $24. It's more than long enough, but needs to be pieced to make it wide enough to cover the hardboard. Trim the excess 8 inches off one side with a serrated edged knife.
 The edge doesn't have to be perfectly smooth where you slice it because it will be covered with the fluffy quilt batting. It should be straight, however, so use the edge of the hardboard to guide your bread knife.
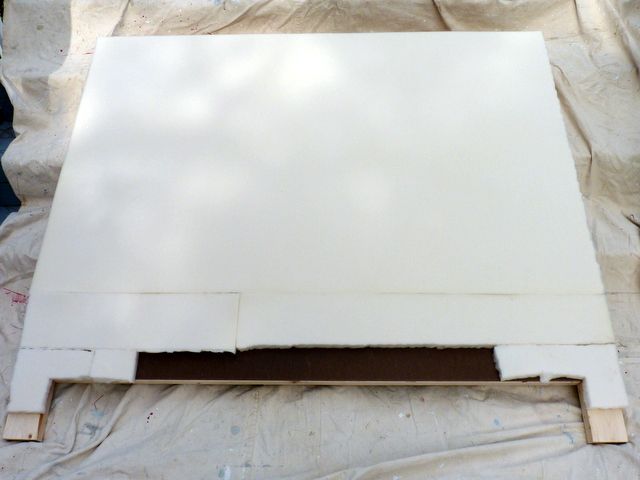
 Since the bed itself will cover the bottom center of the headboard, it's not important to pad it with foam. I used foam scraps to cover most of the legs because the legs usually show. I used a spray adhesive to make sure it didn't slip around while I was covering the headboard, or later with use. But you can use a few pieces of painter's tape to position and hold the foam.
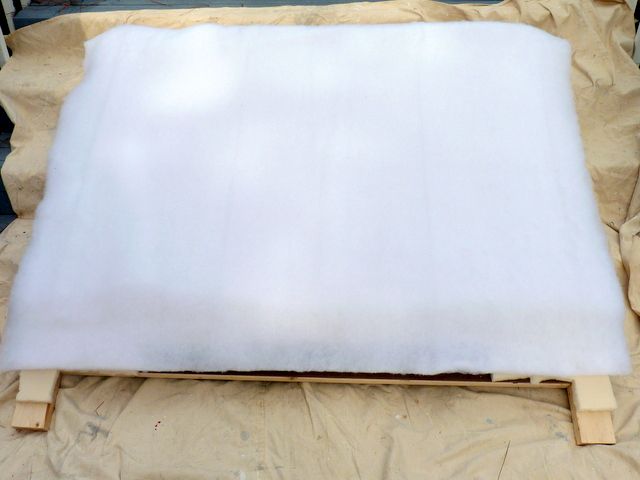
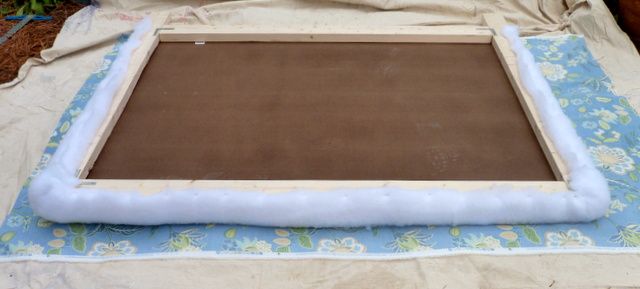
 Lay the batting over the foam. Fold it over so you have two layers. It will be a little short, so let the underneath layer be the shorter one and place it at the bottom of the headboard. Quilt batting comes prepacked or by the yard. I paid $5.50.
 The adhesive or the tape will hold it securely enough while you flip the headboard over, but then you'll want to adjust it to be sure you have enough batting to wrap around and staple on all four sides.
 Begin stapling the batting to the center of each of the four 2 x 4s, and then work out to the corners. Make the corners as smooth as possible.

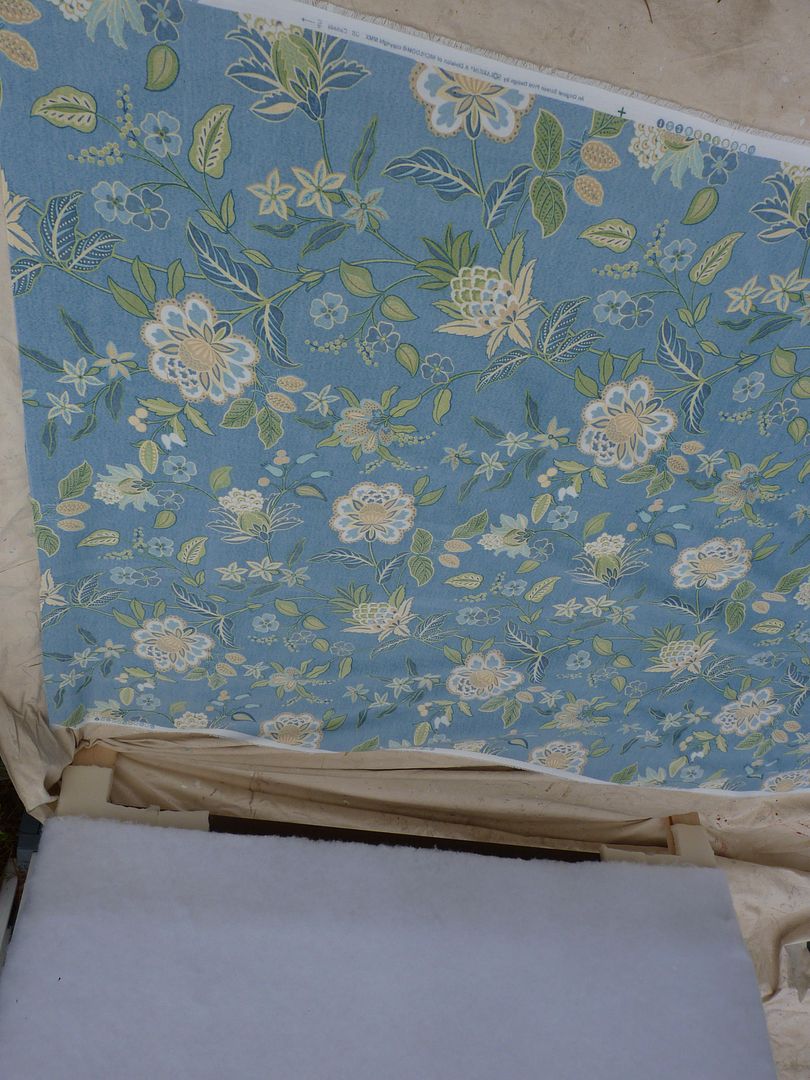
Set the headboard upright, and lay your fabric down in front of it, with the wrong side of the fabric facing the batting. If your fabric pattern has a one-way design or needs to be centered, this is the time to do that. I bought drapery weight rather than upholstery weight and paid $18 for 2 yards. You could spend lots more for something you just gotta have, or hunt around for a bargain and spend less. Chaney bought a $25 curtain panel for her pretty headboard. If your pattern needs to be centered and it's a large design, buy an extra half yard.

Lay the headboard on the fabric, adjusting it so there is enough fabric all around to wrap and staple. If you have more than enough fabric, trim it all from one side (assuming you do not have to center the fabric design). This way, if you want to use the excess fabric for some other decorating project, you'll have one piece rather than two narrow pieces.

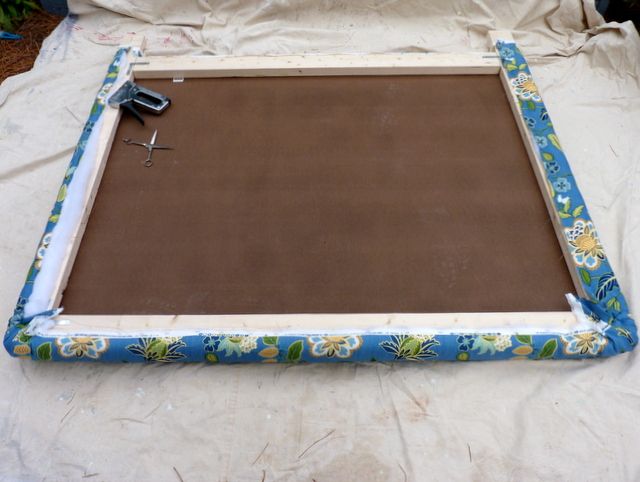
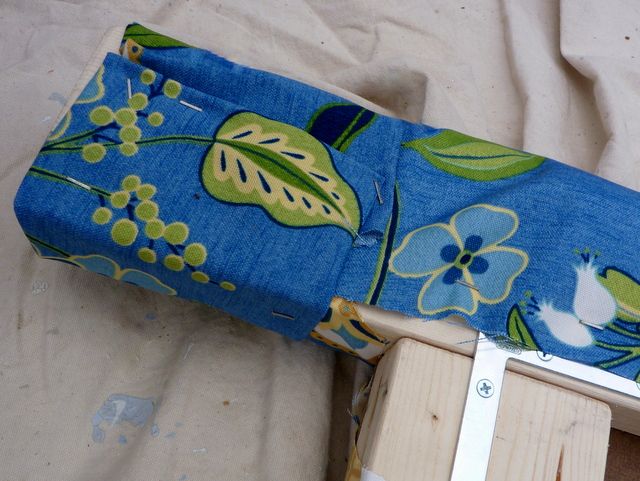
Staple all four sides of fabric to the 2 x 4s, starting in the center of each side, and working out to the corner. To keep the edge from looking wobbly, pull fabric out and away from the center when stapling, rather than pulling straight out. To make smooth, rounded corners, start by stapling them at the very corner, and then work toward the sides by pleating the fabric.
 Cut the fabric to wrap it where the leg meets the board at the inside corner. If your fabric falls short, staple a piece of the scrap fabric to the leg, matching the pattern on the front of the leg if possible.

You can choose to attach the headboard to a bed frame with bolts, but it's probably not necessary. I propped this against the wall. Because the feet are sturdy, it's stable once the bed is against it.
A staged bedroom isn't complete until it has a focal point, and it's usually the headboard. An attractive one like this, made from a fabric that ties all the other elements of the room together MAKES the room. And now you know how to make one yourself that's perfect for staging.
If you have a home for sale, download my home staging eBook, DIY HomeStaging Tips to Sell Your Home Fast and For Top Dollar. You'll be able to tap into all my helpful advice for getting your home sold for a price you like so you can move on to your next adventure!

Screw the corner braces in at the corners as shown. These braces will strengthen the headboard. Lowes sells them in a package of four with screws for less than $3.
Lay the headboard on the fabric, adjusting it so there is enough fabric all around to wrap and staple. If you have more than enough fabric, trim it all from one side (assuming you do not have to center the fabric design). This way, if you want to use the excess fabric for some other decorating project, you'll have one piece rather than two narrow pieces.
Staple all four sides of fabric to the 2 x 4s, starting in the center of each side, and working out to the corner. To keep the edge from looking wobbly, pull fabric out and away from the center when stapling, rather than pulling straight out. To make smooth, rounded corners, start by stapling them at the very corner, and then work toward the sides by pleating the fabric.

You can choose to attach the headboard to a bed frame with bolts, but it's probably not necessary. I propped this against the wall. Because the feet are sturdy, it's stable once the bed is against it.
If you have a home for sale, download my home staging eBook, DIY HomeStaging Tips to Sell Your Home Fast and For Top Dollar. You'll be able to tap into all my helpful advice for getting your home sold for a price you like so you can move on to your next adventure!
